It's a really warm day today - feels like summer! Perfect time to have a big scoop of gelato for lunch! As always, my very favorite place to go for ice cream in Stockholm is Stikki Nikki. She - Nikki herself - makes the gelato daily, from premium organic ingredients, and the quality is just super. I might ask for a quick behind-the-scenes-tour one day - would that be something you'd want to read?
The flavors vary daily by the way. Today I went for Tin Roof and Walnut. Yum!
ads
Thursday, May 28, 2015
Monday, May 18, 2015
And the winner is...
Saturday, May 9, 2015
Philips Pastamaker - giveaway!
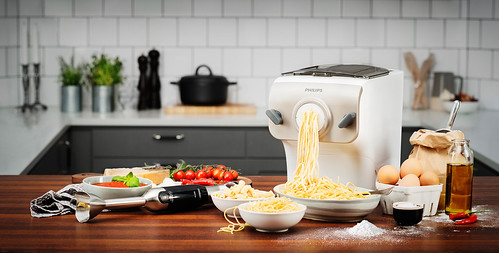
At the end of this post - there's a giveaway, so read on!
Philips have recently put out a pasta maker as part of their koncept ”restaurant at home”, meaning you can produce restaurant quality food in the home. This is an extrusion-style pasta maker, and I was really excited to try it since I’d never tried one before. Normal pasta machines – the kinds with a crank – still require you do make a dough, and then spend a lot of time running the dough to the proper thickness, then cutting it. It’s fun but takes a long time, and I find that the pasta often gets pretty sticky and messy. With an extrusion-pasta maker, the pasta is pushed out through different nozzles, to make different shapes. I was given this machine for an honest review, but I happen to love it.
So, to make pasta, you simply add flour to your machine – I used 400 g durum wheat and 100 g regular all-purpose flour. (This is a double batch which made plenty for our family, but you can also make a regular batch which serves 2, generously.) Next, put on the lid and start the machine. Add the liquid – I had two eggs, and enough water to make a total of 190 g.
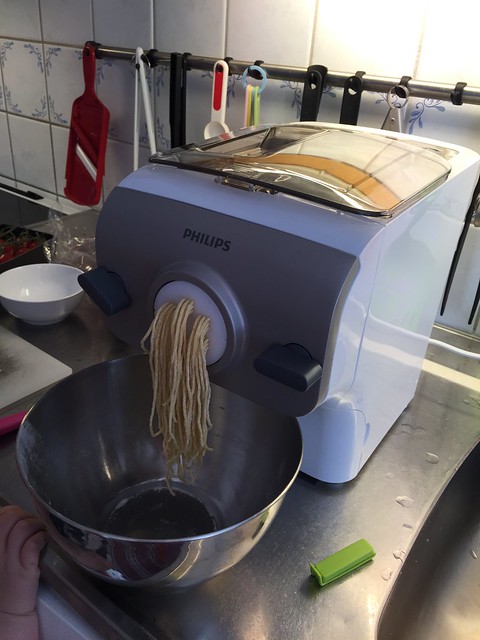
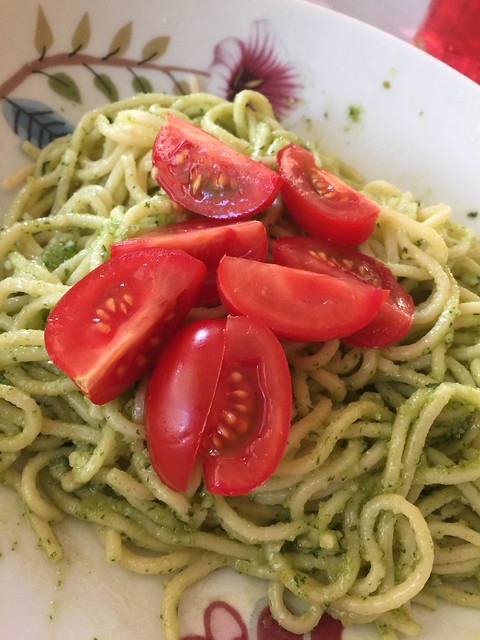
And that is it. That’s all. The machine kneads the dough, and when it’s firm enough, it’ll start pressing it out through the pasta mold. For our first run, we made spaghetti. You have to cut it as it comes out, which means you can make it super short or as long as you want. The resulting pasta was great! It was firmer and a little drier than the home made pasta I’ve made before, so it didn’t stick at all. It needed a little longer cooking time – about five minutes – but that was fine. My three picky eaters – husband and kids – all loved it.
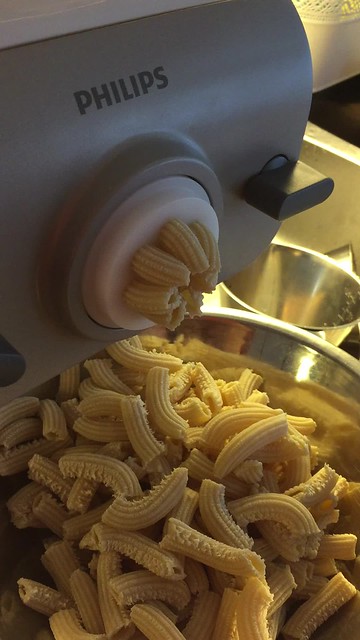
We tried penne the next time, and again, very successful! Our third run was plain pasta sheets (which we used to make these) and again - it was so simple. For these, I used less durum wheat and more all-purpose flour, in an attempt to get a slightly softer dough. It was still a little on the dry side, which is a side effect of the durum. In addition to just pasta, you can also make noodles or even dumpling dough, and you can flavor your pasta as well as long as you keep an eye on the wet-dry proportion. I've even seen someone try to make fresh tortilla chips in the machine - amazing! I *have* to try that next.
Cleaning up is also easy enough. You dissemble all the parts and wash them, and when they’re dry, put them back together. It took me all of three minutes. Which is, incidentally, less time than the pasta needs to cook. I do find the pasta from this machine a little drier than other "fresh pasta", and it needs to cook for a little longer than the pre-made kind. I don't mind this at all, though.
My one and only problem is that I have NO place to store this. It’s a big machine and it’s fairly heavy. I’d love to have it close by but it just really takes a lot of valuable bench space – so you might want to think about that. But other than that, if you love pasta, definitely consider this.
Philips have very generously allowed me to give away one of these machines to one of my readers as well! In order to enter the giveaway, please leave a comment on this post with a recipe for your favorite pasta dish. Don't forget to leave a way to contact you, if you win. I'll hold a random drawing on Sunday, May 17. (Sweden only, I'm afraid.)
Tuesday, May 5, 2015
Pineapple Coconut Cake
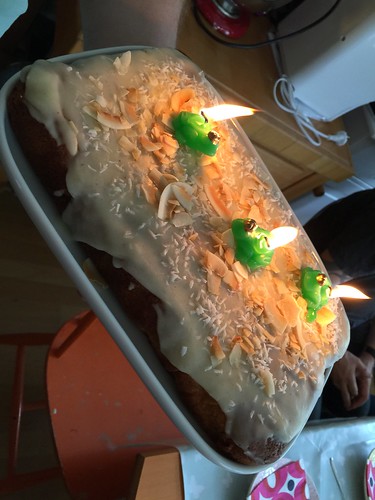
Here's a simple and fun cake that I made for one of Dante's birthday parties. It's fairly basic - vanilla, pineapple and a little coconut on top. It's really easy to make, and you could either make a full cake or cupcakes.
Pineapple Coconut Cake
5-6 pineapple slices - from a can, and save the juice because you need it
3 eggs
200 g sugar
1 tsp cardamom
1 tsp vanilla extract
2 tsp baking powder
100 g butter, melted
270 g all-purpose flour
100 ml buttermilk (Swedish filmjölk works great)
100 ml pineapple juice (from the tin)
Glaze:
1 tbsp vanilla sugar
400 ml confectioner's sugar
40 g melted butter
4-5 tsp pineapple juice (from the tin)
To decorate:
coconut flakes
Cut the pineapple into small bits.
Beat eggs and sugar until very fluffy. Fold in cardamom, vanilla and baking powder, and then butter, flour, buttermilk and pineapple juice.
Pour into a lined baking pan, mine was about 20 by 30 cm and I had enough batter to fill a few muffin cups as well. Bake at 175°C for about 25-30 minutes. Insert a skewer to make sure the cake is cooked.
Stir together all the ingredients for the glaze and add enough pineapple juice to make it spreadable.
When the cake is cooled, spread with the glaze and top with coconut.
Sunday, May 3, 2015
Peanut Butter Cookies with Bacon and Dark Chocolate
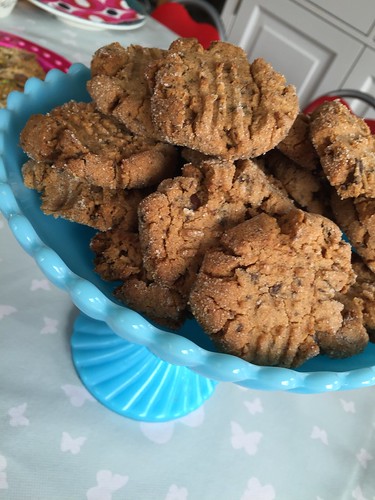
I could barely believe what I was reading as I encountered this recipe over at Joy the Baker. A peanut butter cookie with chocolate isn't all that unique, but with the addition of bacon? Clever! Unique! And fun. And also, very very tasty. My guests were baffled - they couldn't guess the ingredients, but loved the cookies.
These are very soft and crumbly, so be careful - make sure they cool completely on the baking sheets or they will mostly likely fall apart.
As a bonus, these are free from gluten and dairy. Not dietary concerns for me, but for many others.
Peanut Butter Cookies with Bacon and Dark Chocolate
adapted from Joy the Baker
about 40 cookies
340 g peanut butter
200 g sugar (the original uses a mix of white and brown, but I only had white at home)
1 egg
1 tsp baking soda
140 g bacon, cooked to a crisp and coarsely chopped
100 g dark chocolate (I used Lindt 70%)
sugar for coating the cookies
Start by cooking the bacon - I do this in the oven, at 200°C and about ten minutes. Cool completely before chopping.
Combine peanut butter and sugar. Add the egg and baking soda. Fold in bacon and chocolate. Roll into walnut-sized balls (or slightly smaller) and roll in sugar.
Place on lined baking sheets and press down with a fork to make a criss cut pattern. Bake at 175°C for about 10-12 minutes. Cool completely on the sheets before transferring.
Friday, May 1, 2015
Milk Chocolate Pistachio Cookies
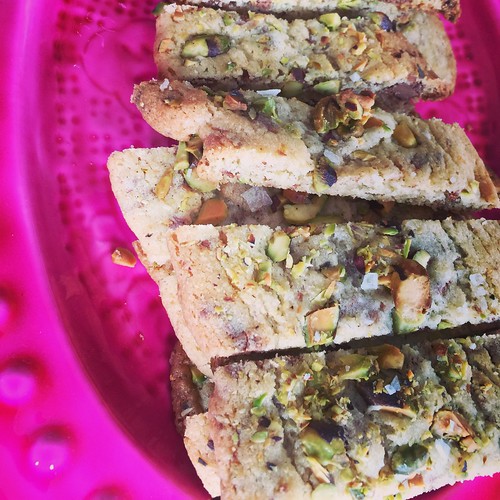
Honestly one of the best cookies I've ever made. The combination of chewy cookie, sweet milk chocolate and crunchy pistachios, accented by flaky sea salt, is sure to be a really big hit.
Milk Chocolate Pistachio Cookies
makes 40 or so
150 g butter, softened
140 g caster sugar
140 g brown sugar
1 egg
2 tsp vanilla sugar (or 1 tsp extract)
1/2 tsp baking soda
pinch of salt
240 g all-purpose flour
100 g milk chocolate, coarsely chopped
50 g chopped up roasted, unsalted pistachios
a few pinches of sea salt
a few pinches of sea salt
Start by creaming the butter and both types of sugar very, very well. (My butter was, as usual, not softened, so I just creamed it for much longer.) Add the egg and vanilla and beat until mixed. Add the dry ingredients - baking soda, salt and flour - and mix until combined. Finally add the chocolate.
Shape into four slender logs and place on lined baking sheets. Press pistachios into the top, and sprinkle with salt. Bake at 175°C for 10-12 minutes. Remove from the oven and leave to cool for a minute before cutting them, diagonally, into cookies. Leave to cool completely.
These freeze very well but lose some of their chewiness.
Subscribe to:
Comments (Atom)
